Hey everyone!
Sorry for the delay in my posts. It turns out the only real limitation of AI is the human element! Balancing work, code testing, and blogging takes way more time and effort than I anticipated. I’m still getting the hang of this, so it’s been quite the learning experience. Thanks for your patience (assuming there’s anyone actually reading this).
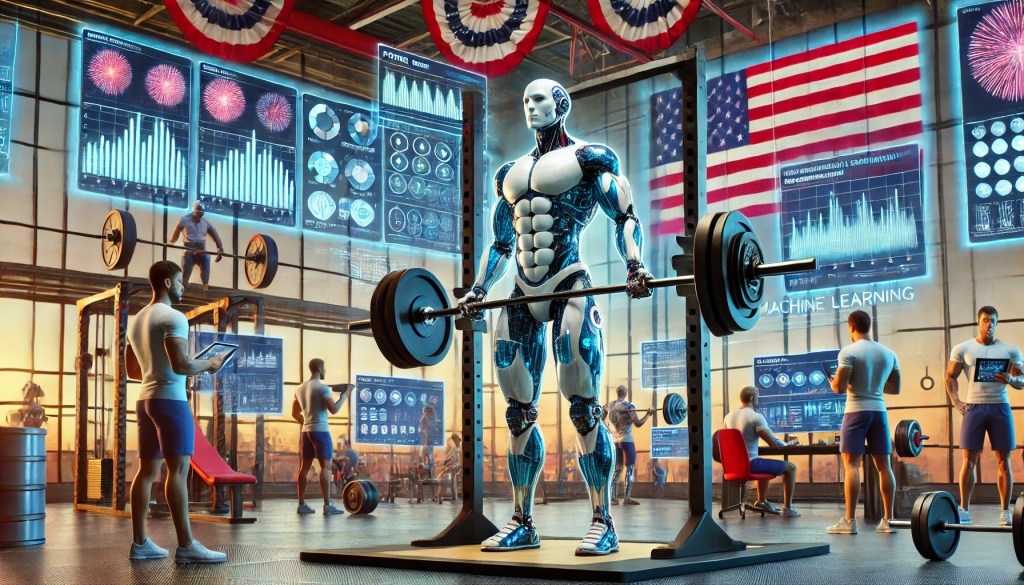
Just a reminder, all the code here is generated by ChatGPT-4o, so there’s bound to be some trial and error along the way. Let me know your thoughts on the code. You can access my Github here. Before we kick off, I hope everyone had an awesome 4th of July! Check out some photos I snapped with my Nocs Zoom Tube and Pixel. Enjoy!


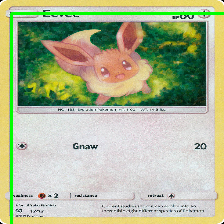
In my last post, I outlined the initial steps of creating a Pokémon card recognition model, including data collection, preprocessing, and initial model training. If you missed it, you can check it out here. After further testing, I noticed that the bounding boxes weren’t aligning correctly at all. The images were also too small to see any card details—something that might prove to be a significant issue later.
I’ve updated the code from my last post, but there’s still some refinement needed for the bounding boxes. This is where the trial and error really kicks in, especially since I’m relying on ChatGPT-4o. Check out the latest updates below!

Tech Stuff:
In this blog post, we will continue refining the data_prep_new.py script using ChatGPT-4o. I’ve switched to larger images of the Pokemon cards and applied box bounding rules to the script. This project leverages TensorFlow, OpenCV, and data augmentation techniques to accurately identify Pokémon cards and extract relevant information such as the card’s name, set series number, and central image.
Prerequisites
Before diving into the details, ensure you have the following installed on your system:
- Python 3.x
- TensorFlow 2.x with GPU support
- OpenCV
- Necessary NVIDIA drivers and CUDA/cuDNN libraries
Step-by-Step Process
1. Setting Up the Environment
First, ensure your environment is properly configured with the necessary libraries. Install TensorFlow and OpenCV using pip:
pip install tensorflow opencv-python
Ensure your NVIDIA drivers, CUDA, and cuDNN libraries are correctly installed and configured for TensorFlow to utilize the GPU.
2. Data Preparation
We start by preparing the dataset of Pokémon card images. Images are resized, normalized, and augmented to enhance the training process. The following script, data_prep_new.py, handles these tasks:
import os
import cv2
import numpy as np
import tensorflow as tf
from tensorflow.keras.preprocessing.image import ImageDataGenerator, img_to_array
from sklearn.preprocessing import LabelEncoder
from tensorflow.keras.utils import to_categorical
import time

def load_and_augment_images_from_folder(folder, size=(224, 224), sample_size=None):
    images = []
    labels = []
    datagen = ImageDataGenerator(
        rotation_range=20,
        width_shift_range=0.2,
        height_shift_range=0.2,
        shear_range=0.2,
        zoom_range=0.2,
        horizontal_flip=True,
        brightness_range=[0.8, 1.2],
        fill_mode='nearest'
    )

    print(f"Loading images from: {folder}")
    start_time = time.time()

    for i, filename in enumerate(os.listdir(folder)):
        if filename.endswith(".png"):
            if sample_size and i >= sample_size:
                break
            label = filename.split('_')[0]
            img = cv2.imread(os.path.join(folder, filename))
            if img is not None:
                img = cv2.resize(img, size)
                img = img_to_array(img)
                images.append(img)
                labels.append(label)

                # Apply data augmentation
                img = img.reshape((1,) + img.shape)
                for batch in datagen.flow(img, batch_size=1):
                    augmented_img = batch[0].astype('float32')
                    images.append(augmented_img)
                    labels.append(label)
                    break

            # Log progress every 10 images
            if (i + 1) % 10 == 0:
                elapsed_time = time.time() - start_time
                print(f"Processed {i + 1} images in {elapsed_time:.2f} seconds")

    end_time = time.time()
    print(f"Finished loading images at {time.strftime('%Y-%m-%d %H:%M:%S', time.gmtime(end_time))}")
    print(f"Total loading time: {end_time - start_time} seconds")

    return np.array(images), np.array(labels)
3. Defining Regions of Interest (ROIs)
To focus on specific areas of the card such as the name, set series number, and central image, we define ROIs. These regions help in accurately detecting and extracting the required information.
def detect_objects(image_np, model, name_roi, number_roi, central_image_roi):
    input_tensor = tf.convert_to_tensor(image_np)
    input_tensor = input_tensor[tf.newaxis, ...]
    detections = model(input_tensor)

    detection_boxes = detections['detection_boxes'][0].numpy()
    detection_scores = detections['detection_scores'][0].numpy()
    detection_classes = detections['detection_classes'][0].numpy()

    # Filter detections based on ROIs
    filtered_boxes = []
    for i in range(detection_boxes.shape[0]):
        box = detection_boxes[i]
        score = detection_scores[i]
        if score > 0.5:
            ymin, xmin, ymax, xmax = box
            if (name_roi[0] <= ymin <= name_roi[2] and name_roi[1] <= xmin <= name_roi[3]) or \
               (number_roi[0] <= ymin <= number_roi[2] and number_roi[1] <= xmin <= number_roi[3]) or \
               (central_image_roi[0] <= ymin <= central_image_roi[2] and central_image_roi[1] <= xmin <= central_image_roi[3]):
                filtered_boxes.append((box, score, detection_classes[i]))

    return filtered_boxes
4. Training the Model
Once the data is prepared and ROIs are defined, the next step is training the model. Using a pre-trained model such as SSD ResNet50 from the TensorFlow Model Zoo, we fine-tune it with our dataset.
model_dir = '/path/to/model/ssd_resnet50_v1_fpn_640x640_coco17_tpu-8'
model = tf.saved_model.load(os.path.join(model_dir, 'saved_model'))

large_images_dir = '/path/to/large_images'
images, labels = load_and_augment_images_from_folder(large_images_dir, sample_size=100)

images = images.astype('float32') / 255.0

label_encoder = LabelEncoder()
integer_encoded = label_encoder.fit_transform(labels)

one_hot_labels = to_categorical(integer_encoded)

output_file = '/path/to/output/boxes.npy'

annotations = []
start_time = time.time()

# Define ROIs for name, series number, and central image
name_roi = [0.0, 0.0, 0.2, 1.0]  # Top 20% of the image
number_roi = [0.9, 0.0, 1.0, 1.0]  # Bottom 10% of the image
central_image_roi = [0.2, 0.0, 0.7, 1.0]  # Middle 50% of the image

for filename in os.listdir(large_images_dir):
    if filename.endswith('.jpg') or filename.endswith('.png'):
        image_path = os.path.join(large_images_dir, filename)
        image_np = load_image_into_numpy_array(image_path)
        filtered_boxes = detect_objects(image_np, model, name_roi, number_roi, central_image_roi)

        # Process the filtered boxes
        for box, score, class_id in filtered_boxes:
            ymin, xmin, ymax, xmax = box
            (im_height, im_width, _) = image_np.shape
            (xmin, xmax, ymin, ymax) = (xmin * im_width, xmax * im_width, ymin * im_height, ymax * im_height)
            annotations.append([filename, float(xmin), float(ymin), float(xmax), float(ymax)])

end_time = time.time()
print(f"Finished bounding box extraction at {time.strftime('%Y-%m-%d %H:%M:%S', time.gmtime(end_time))}")
print(f"Total bounding box extraction time: {end_time - start_time} seconds")

boxes = np.array(annotations)
np.save(output_file, boxes)
5. Visualization and Validation
After training the model, we visualize and validate the results by drawing bounding boxes around the detected regions and comparing them with the ground truth.
def save_bounding_box_images(images, boxes, sample_size=10):
    for i in range(sample_size):
        image = images[i]
        box = boxes[i, 1:]
        print(f"Image {i} Box coordinates: {box}")
        image = (image * 255).astype(np.uint8)
        try:
            cv2.rectangle(image, (int(float(box[0])), int(float(box[1]))), (int(float(box[2])), int(float(box[3]))), (0, 255, 0), 2)
        except ValueError as e:
            print(f"Error drawing box on image {i}: {e}")
            continue
        output_path = os.path.join('/path/to/visualizations', f"image_with_box_{i}.png")
        cv2.imwrite(output_path, image)

save_bounding_box_images(images, boxes, sample_size=10)
Conclusion
Creating a Pokémon card detection and recognition system involves several key steps: data preparation, defining regions of interest, training the model, and visualizing the results. This is the finished script for today’s blog post. Based on the output, I’ll further refine the code using ChatGPT-4o. I’m currently having issues around the box bounding. Any input would be appreciated! Look out for more posts to come!

Leave a comment